 |
CRI ADX
Last Updated: 2025-05-07 13:34 p
|
 |
CRI ADX
Last Updated: 2025-05-07 13:34 p
|
In some cases, we want to use additional effects such as reverberations to add a sense of space to the sound effects.
This section describes how to add a reverberation effect to a sound by using a bus send.
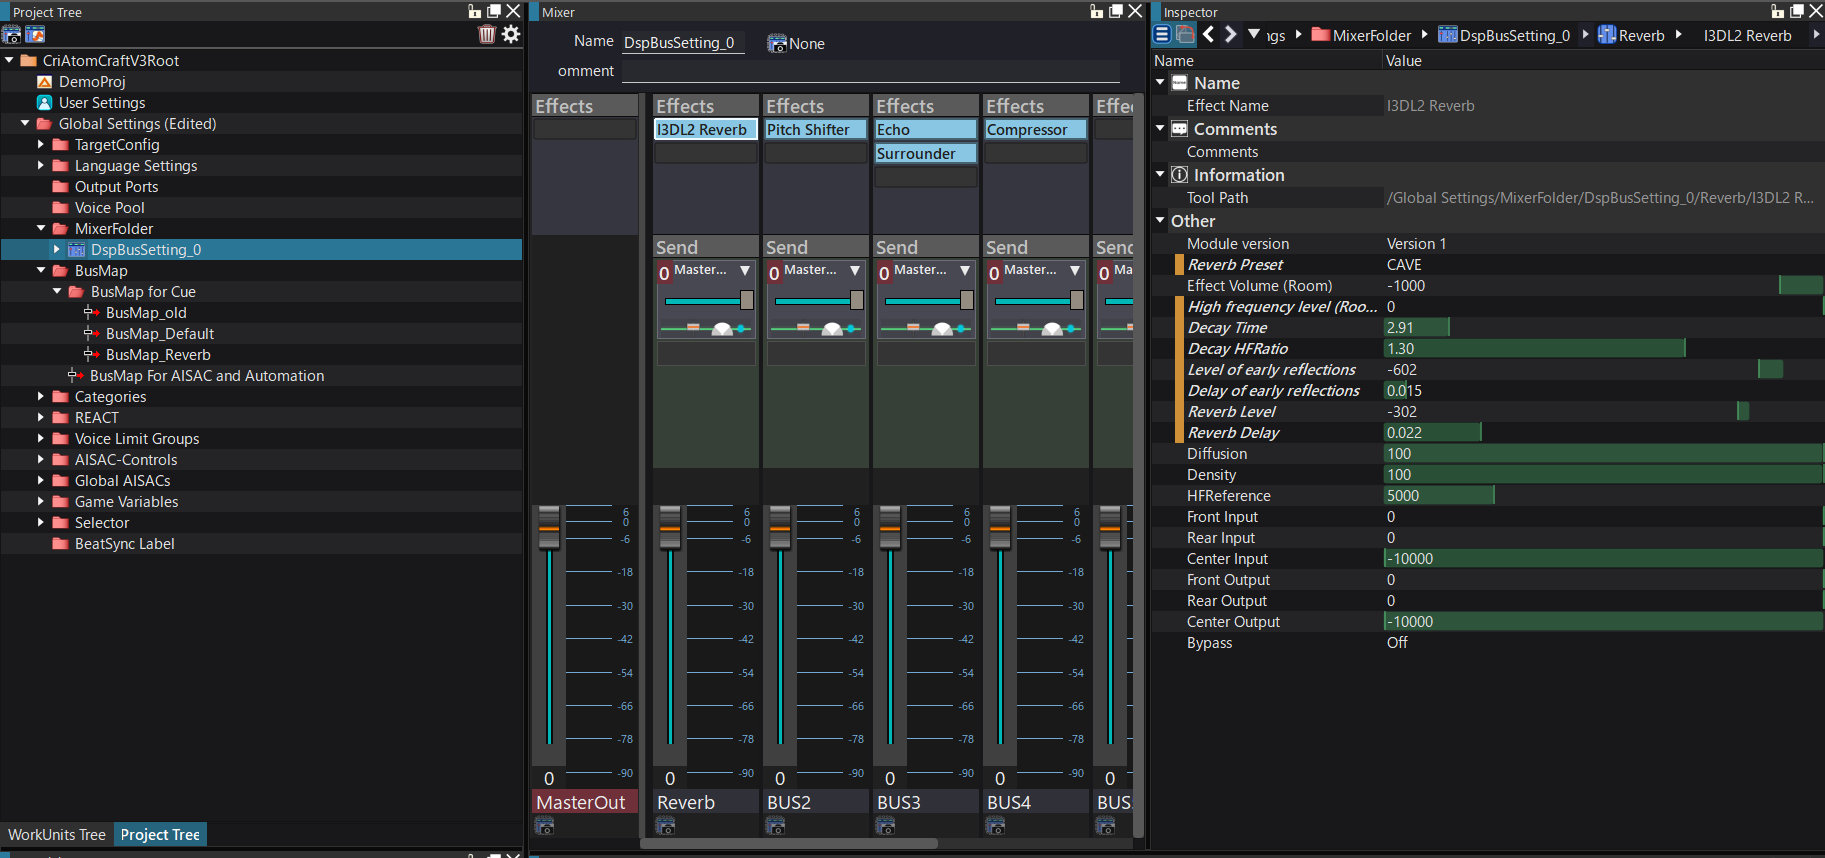
Before you begin, you need to add a Bus for the reverberation to the Mixers.
For more information about the Mixers, refer to "Mixer" .
For more information on adding a Bus, refer to "Bus" .
Here, we create a bus for the reverberation named "Reverb".
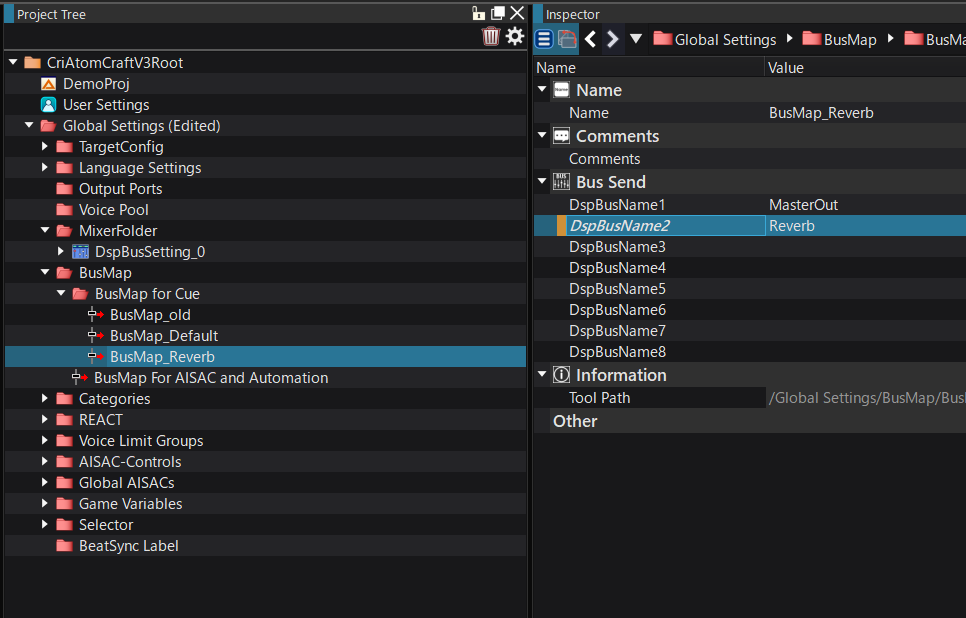
A bus map is a global item which is used to manage the destination of up to eight buses including the MasterOut.
There are two types of bus maps: Cue configuration bus map, which is used for Cues, and AISAC/Automation bus map, which is used for AISACs and automation.
A project may contain multiple "Cue configuration bus maps", which will be used depending on the Cue being played.
A project may contain only one AISAC/Automation bus map, which is used for any AISAC and Automation bus send.
Here, we use a "Cue configuration bus map".
For more information about the Cue configuration bus map and how to create it, refer to "Bus Map" .
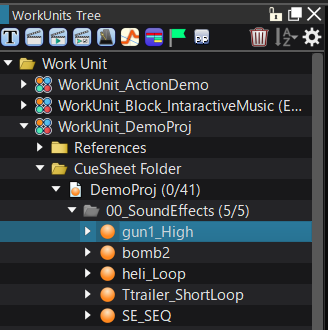
Select a Cue on the tree.
The Cue Inspector is displayed.
To specify the destination bus, you can apply the bus map you already created or specify a destination Cue separately.
When a new Cue is created, the bus map set to the "Bus map based on a new Work Unit" is automatically applied.
For information on the bus map based on a new Work Unit, refer to "Bus Map" .
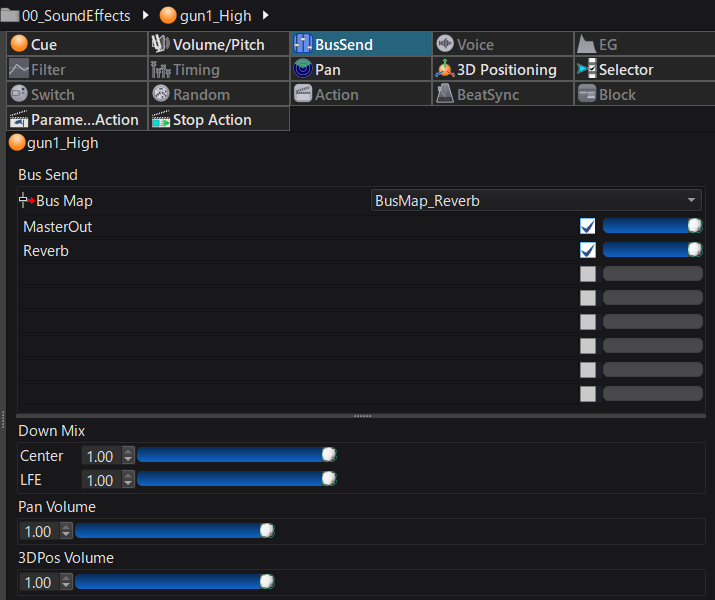
You can assign a bus map to a Cue from the Cue Inspector.
From the combo box menu next to the "BusSend", select the bus map to be assigned.
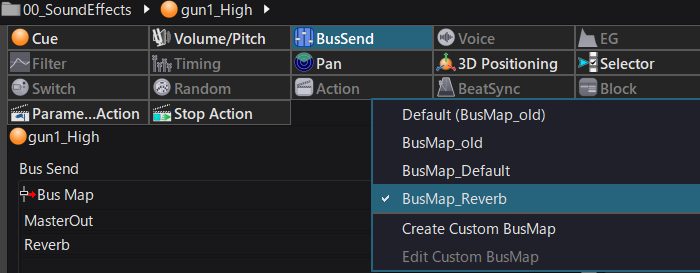
When the destination of the bus is changed in the Cue configuration bus map settings screen, the new settings are automatically applied to all the Cues using the modified bus map.
The following items can be configured in the bus map settings of a Cue.
If the settings are set to default, the settings of the parent object in the tree are used.
For example, if the Cue settings are set to default, the settings of the CueFolder (if there is no CueFolder, the settings of the CueSheet) will be used. It they are also set to default, the settings of the object further up in the tree will be used.
This allows to manage the bus map settings for groups of objects, for whole CueSheets or CueSheet folders for example.
If the checkbox next to a destination bus name is selected, the send level for this bus is enabled.
Click on the checkbox for the Reverb bus, so that you can adjust the send level with the mouse.
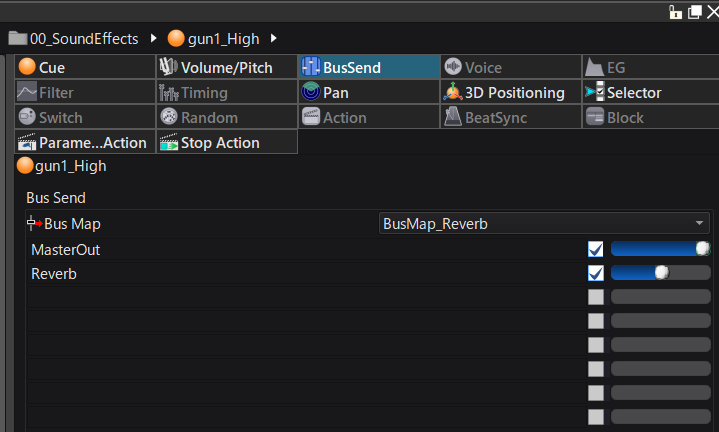
If you start a preview playback with the send level for the Reverb set to 1.00, the sound is now played with a reverberation effect.
If you set the send level for the Reverb bus to 1.00 and the send level for the MasterOut bus to 0.00, you will only hear the reverberation component.
Using a bus map makes it easy to manage destination Busses common to multiple Cues. The number of bus maps increases each time a destination Bus pattern changes.
If there is no need to use a destination Bus common to multiple Cues, and if you want to change the destination bus of a specific Cue, make the bus map custom (Cue-specific).
Click on the empty area under the section displaying the "MasterOut" bus and select the "Reverb" bus from the context menu.
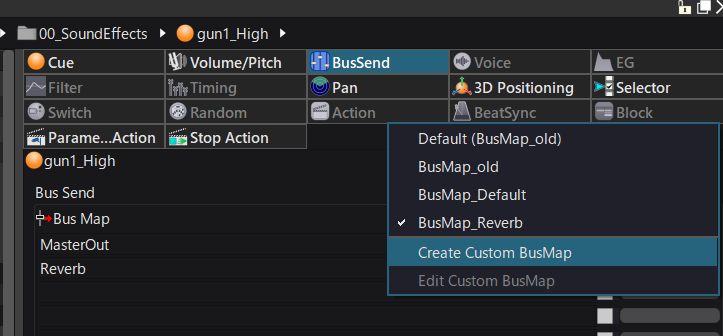
When you change the destination Bus name in the bus send in the Cue, the bus map is marked as "Custom".
This means that the bus uses the Cue-specific bus map instead of referencing the bus map in the global settings.
Regardless of the method used, the binary files (ACF, ACB file) are not affected (the bus destination is written for each Cue).