|
CriWare Unreal Engine
Plug-ins for CriWare solutions.
|
|
CriWare Unreal Engine
Plug-ins for CriWare solutions.
|
We will introduce CRI's Unreal Engine plugin and implement how to play ADX sound data on UE5.
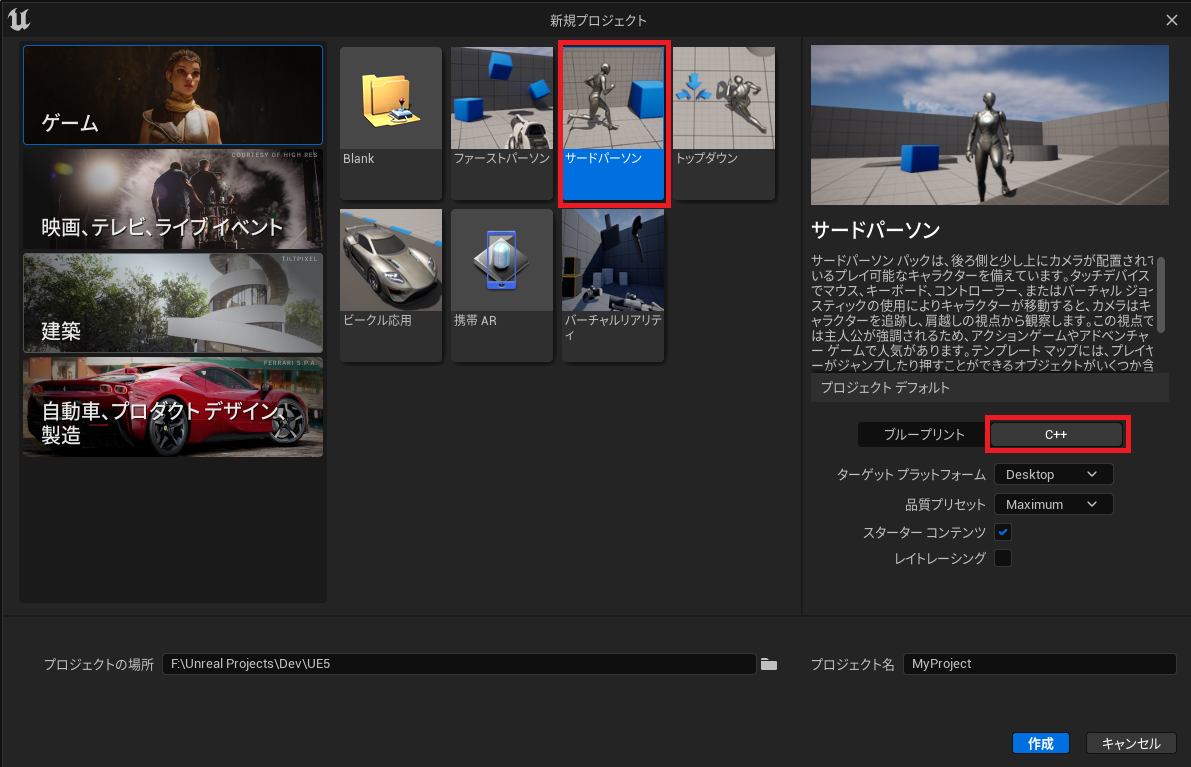
If you fail to create a new project, please check the following:
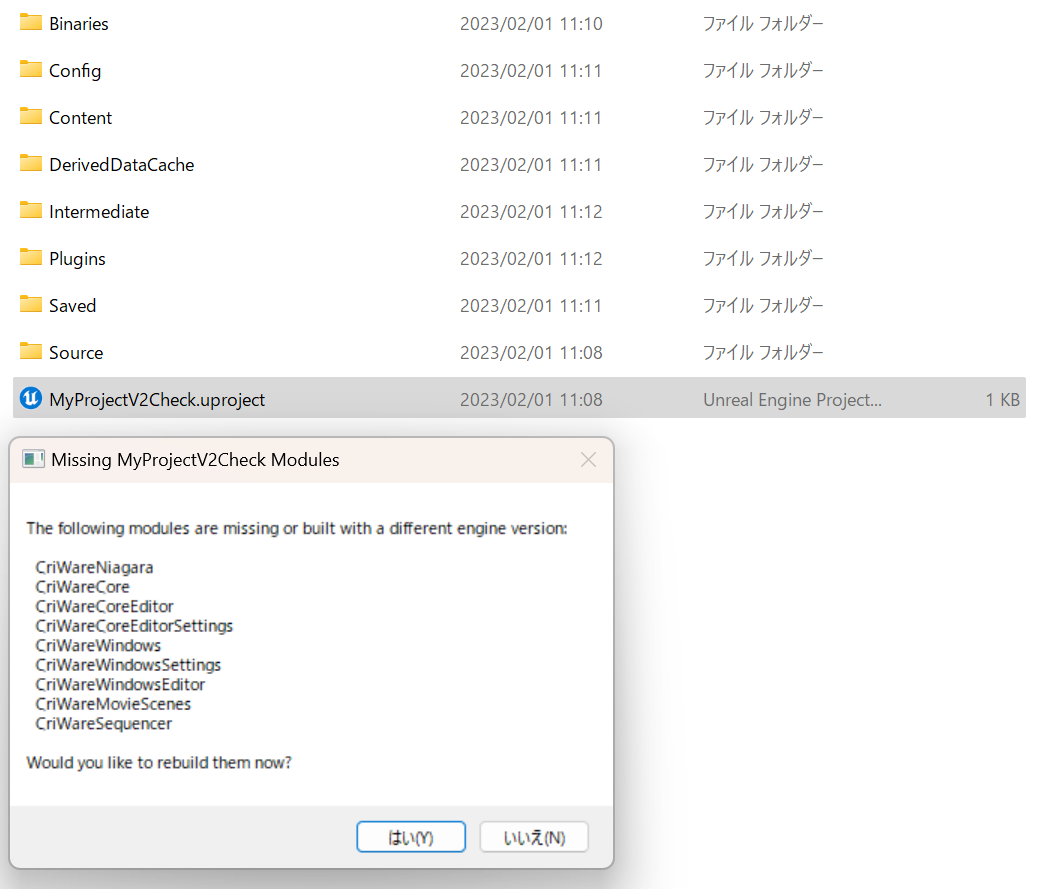
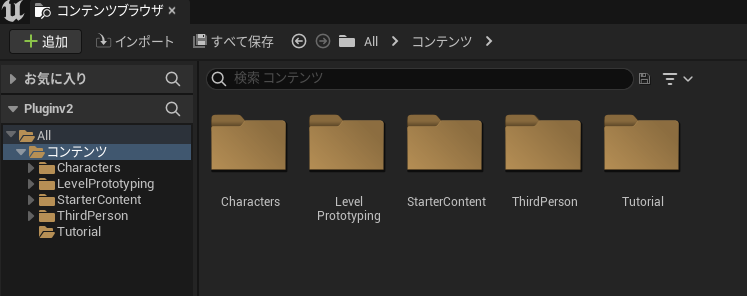


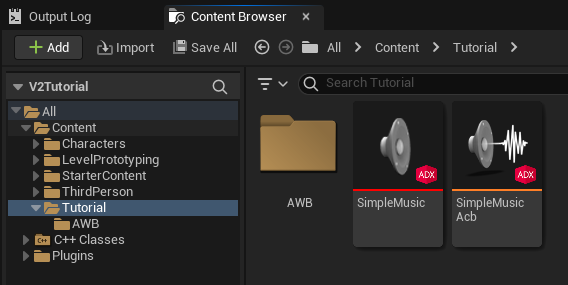
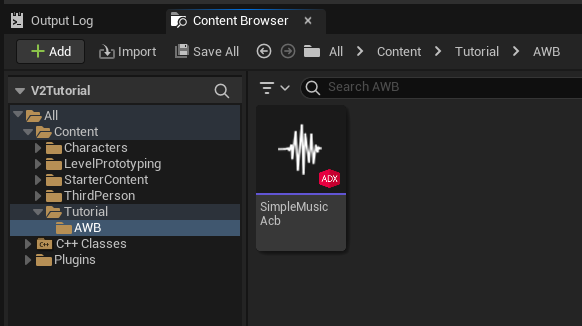
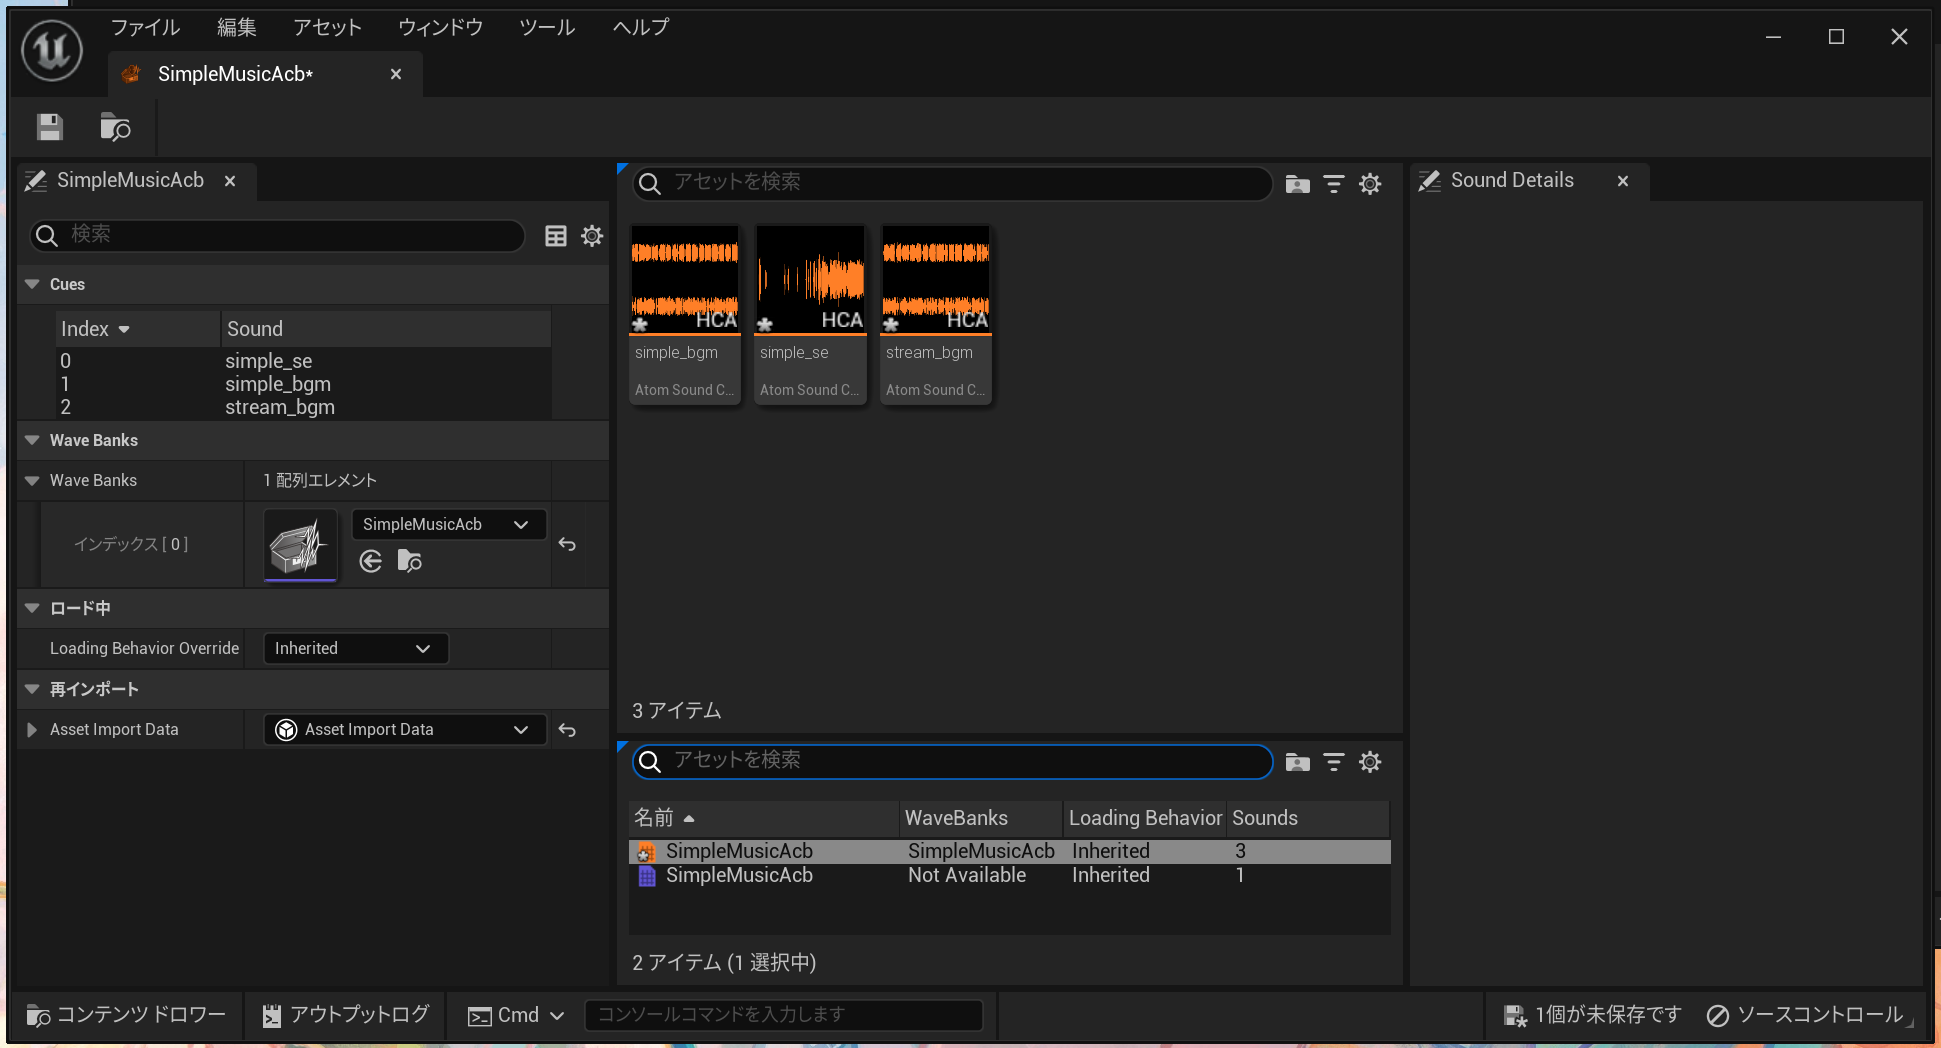

Please refer to the link below.
[About ACB files]( https://game.criware.jp/manual/adx2_tool/latest/criatom_tools_atomcraft_acb_file.html )
[About AWB files]( https://game.criware.jp/manual/adx2_tool/latest/criatom_tools_atomcraft_awb_file.html )
[About ACF files]( https://game.criware.jp/manual/adx2_tool/latest/criatom_tools_atomcraft_acf_file.html )
Please see the following section in the manual.
・Explanatory article about asset generated when importing ACB files
ADX Tutorial No.19: Learn about Cue sheets
・An explanatory article about the asset generated when importing an ACF file
Atom Config asset Reference Guide
・Explanatory article about asset generated when importing AWB files
About AtomWaveBank asset
In this article, we will show you how to manually edit the CRI plugin configuration and register Atom Config asset.
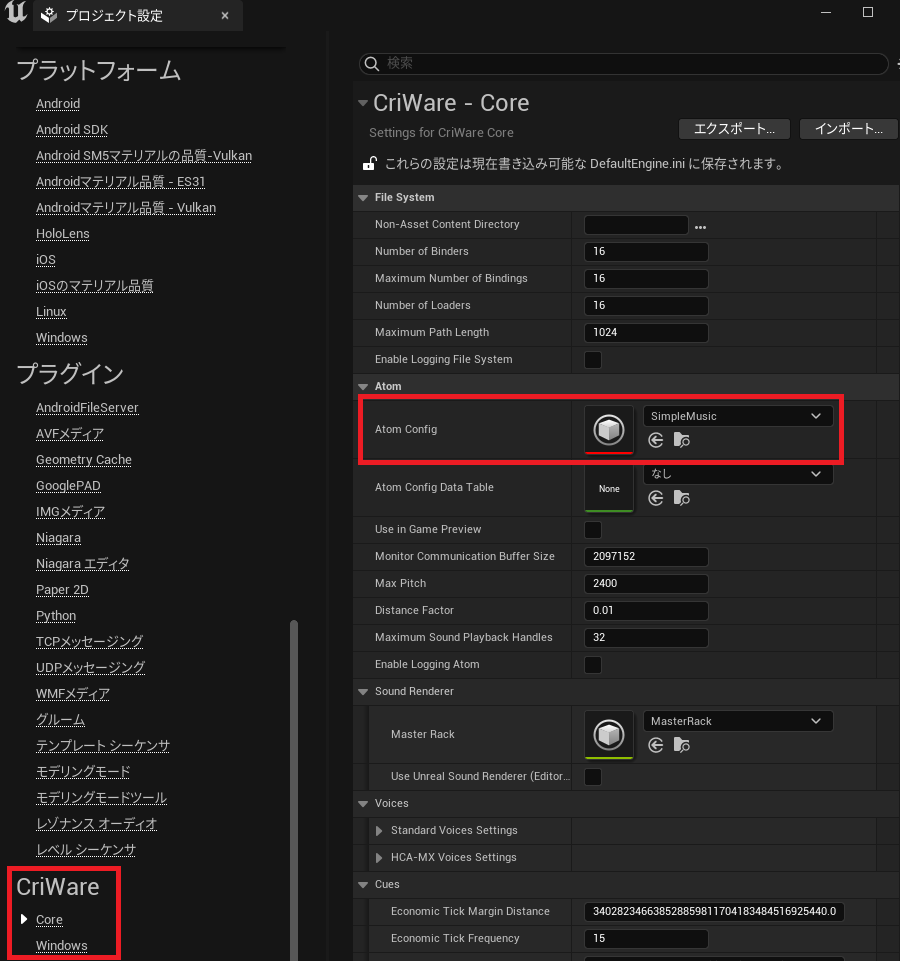
By setting "Atom Config", the settings of the AtomConfig uasset will be reflected. In other words, settings such as category classification and bus settings will be reflected.
Please see the following section in the manual. Project Settings Parameter Reference Guide
This article explains how to place a sound source on the level and play it. The CRI plugin provides several ways to play audio, but here we will introduce the following two methods.
AtomCueSheetDouble-click the "SimpleMusic" asset in the Content Browser to open the Details tab. The Cues property displayed here lists the Cue in the SimpleMusic Cue sheet. Individual asset files are not generated for each of these Cue , but they can be referenced as asset in the Unreal Engine . Drag and drop the Cue "simple_se"asset into the Viewport to place it as an AtomAmbientSound actor in the level.
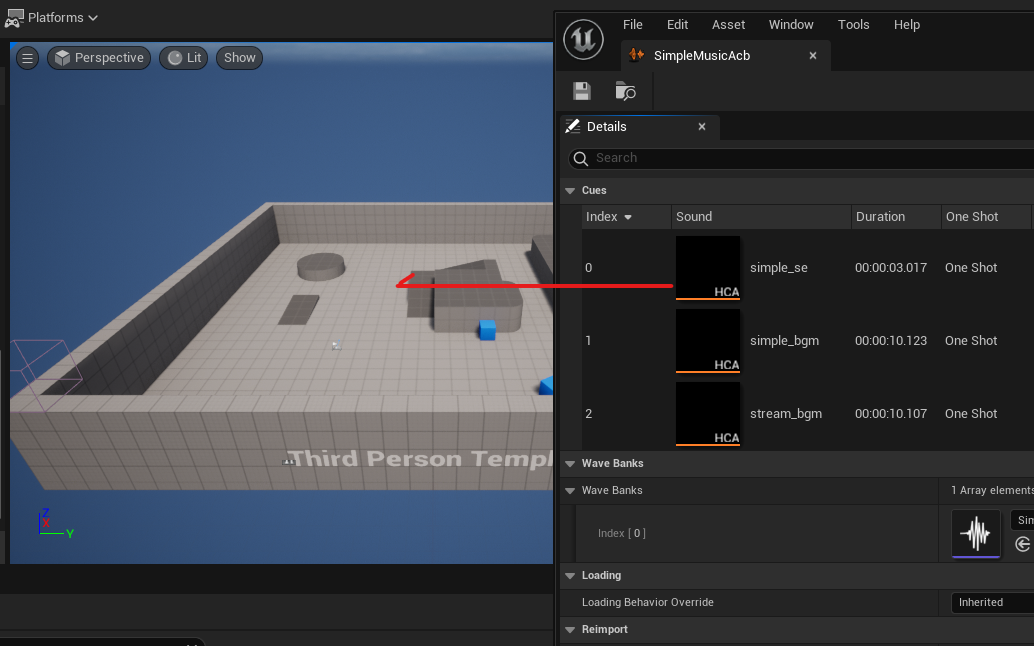
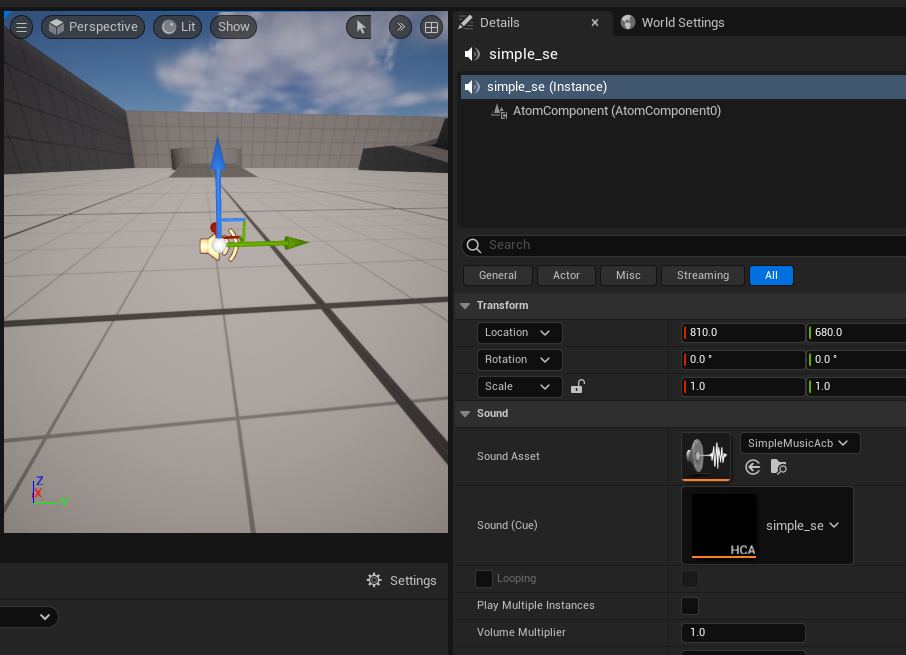 AtomAmbientSound is an Actor with an AtomComponent, which we'll explain later. Run your level and move your player character close to the sound source. You'll hear the Cue you set being played.
Place an Actor in the level to which you will attach an AtomComponent, which is the component for playing audio.
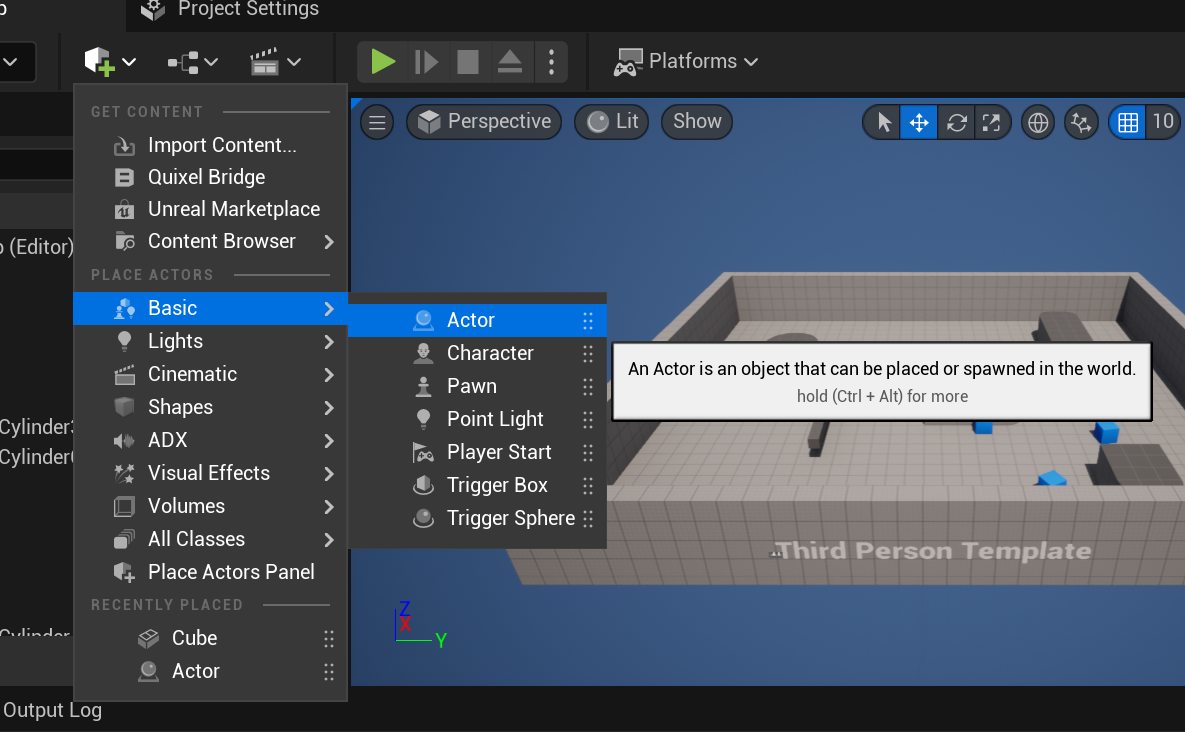
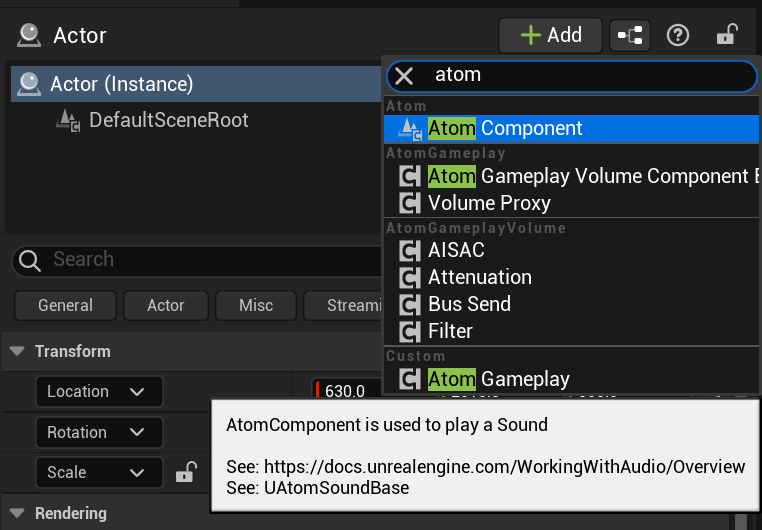
Select an Actor in the level so that it has focus in the Outliner, then click the "Add" button in the Details tab and select the AtomComponent class.
 Once the AtomComponent is attached to the target Actor, the Details tab will look like this:
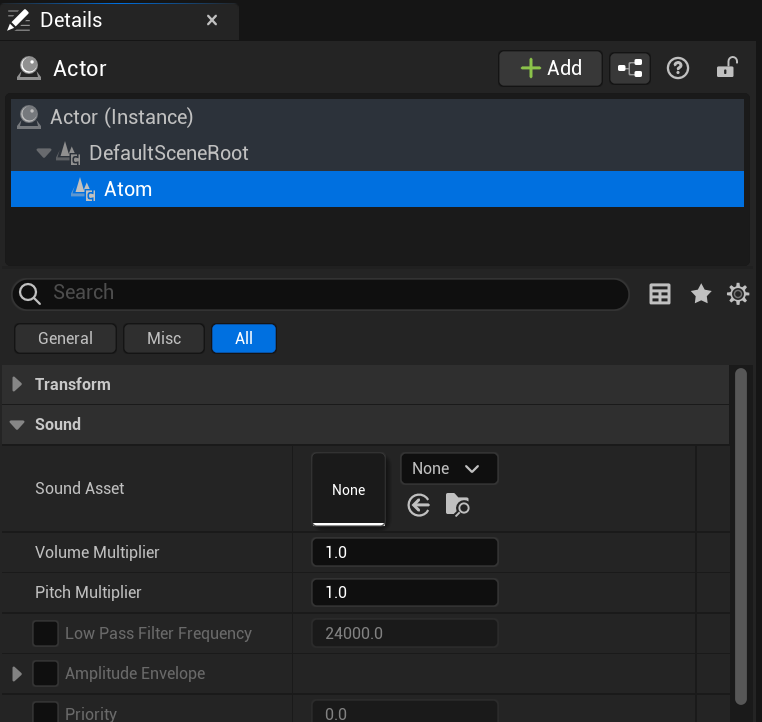
You can set the "Sound" property for the AtomComponent on the Details tab. Set the Atom Cue Sheet asset "SimpleMusicAcb" here. Then set the "Sound (Cue)" property to the "simple_bgm" Cue.
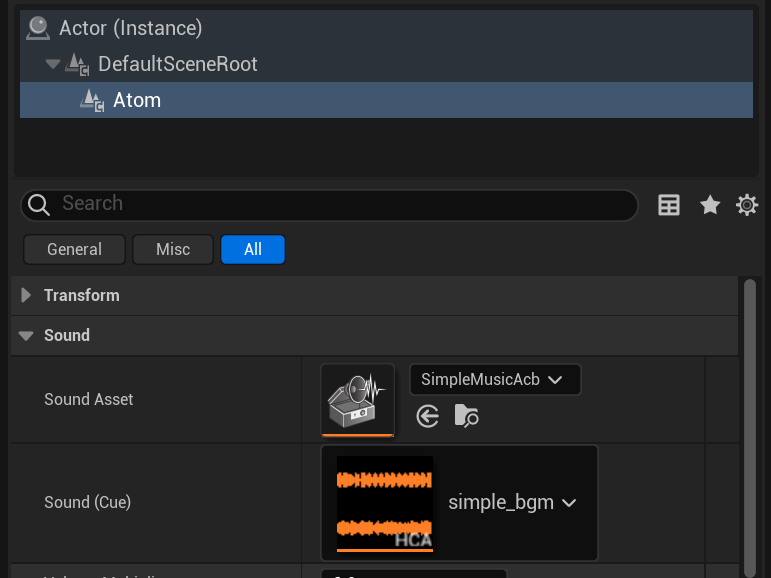
Run your level and move the player character closer to the sound source. You will see Cue being played. If you want to preview them as 2D sounds instead of 3D sounds with distance attenuation, set the "Allow Specialization" property of the AtomComponent to false.

THIS SERVICE MAY CONTAIN TRANSLATIONS POWERED BY GOOGLE. GOOGLE DISCLAIMS ALL WARRANTIES RELATED TO THE TRANSLATIONS, EXPRESS OR IMPLIED, INCLUDING ANY WARRANTIES OF ACCURACY, RELIABILITY, AND ANY IMPLIED WARRANTIES OF MERCHANTABILITY, FITNESS FOR A PARTICULAR PURPOSE AND NONINFRINGEMENT.