CRIWARE Unity Plugin Manual
Last Updated: 2026-07-17
Control method using Animator
This section explains how to implement lip-sync using the Unity Animator / AnimationClip link function.
1. Basic Usage
1.1 Adding an Animator to the scene
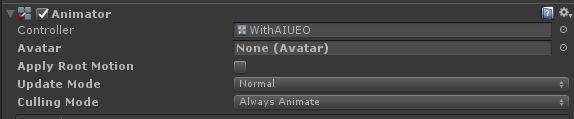
Attach Animator to the character and register an AnimationController.
You can also perform the operations described in Step 1.2 on the Animator/AnimationController you are already using.
Animator Component
1.2 Adding layers to the AnimationController
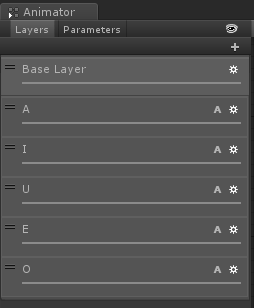
Display the registered AnimationController in the Animator window and add a layer corresponding to the analysis result output value to be controlled.
Animator Window
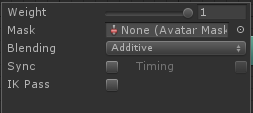
Click the gear mark for each layer and apply the following settings.
Weight: 1.0
Blending: Additive
LayerSettings Window
1.3 Adding an Animation
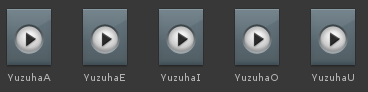
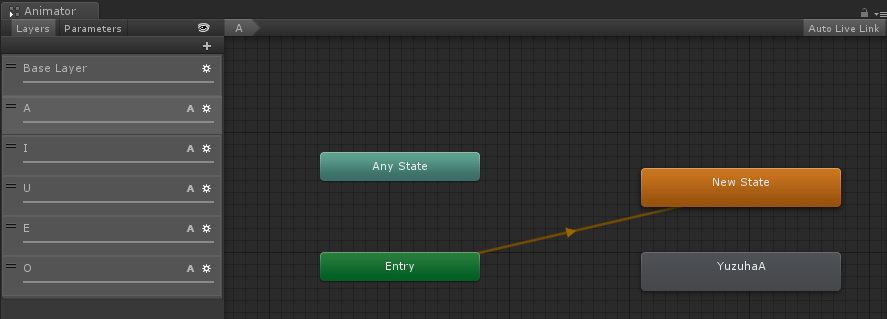
Add a separate Animation to the project and register it as a state on each layer.
At this time, it is recommended to prepare an empty state as the transition destination from Entry in order to prevent each Lip Sync Animation from being played when in the uncontrolled state.
State Transition Settings
1.4 Editing the AnimationClip
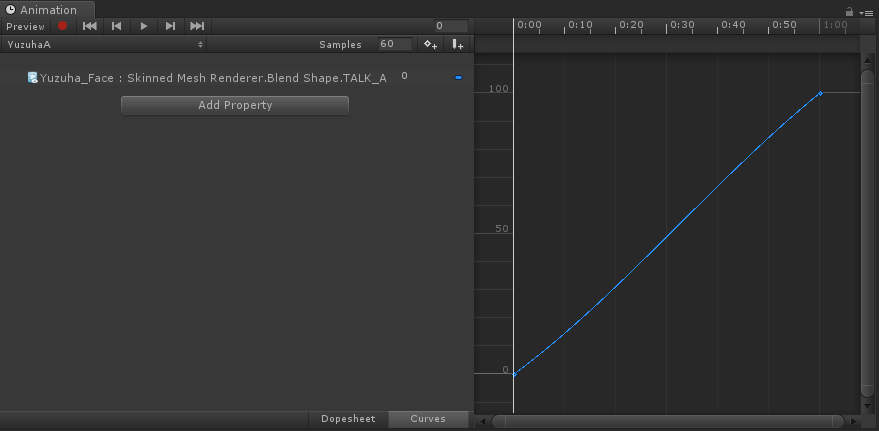
For each Lip Sync Animation, open the Animation window and add controlled blend shapes, etc. as properties.
Modify the curve so that the value at 0:00 is the value when the mouth is tightly closed, and the one at 1:00 is the value when the mouth is completely opened.
Editing AnimationClip
1.5 Registering with the ADX LipSync Component
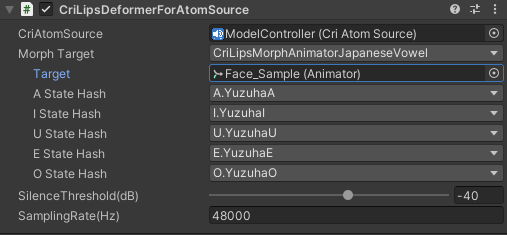
Apply the settings below to the CriLipsDeformer component placed in the scene.
MorphTargert:
A class that implements morphing by Animator
Target:
the Animator just added
(AIUEO) State Hash:
Association between the output value corresponding to (AIUEO) and the state name of each layer added to the AnimationController
Settings for CriLipsDeformer Components
With these settings, the Animation will be played according to the analysis results.
2. Practical Usage
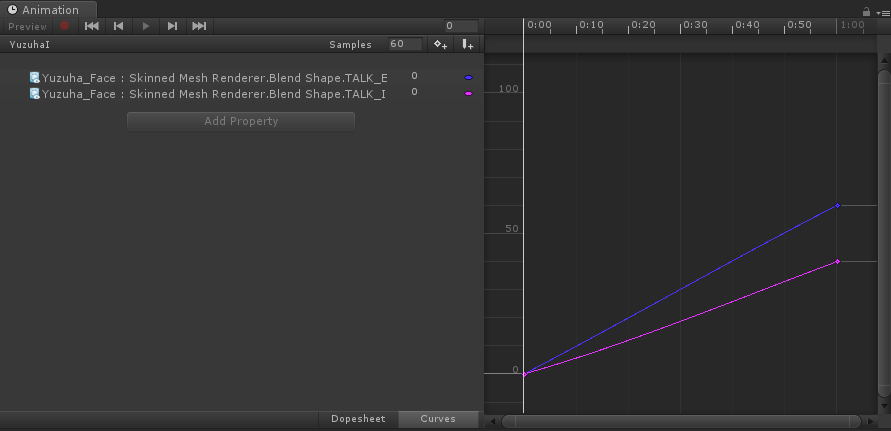
Since it is possible to use an AnimationClip for the control, the output result can be scaled when applying it to a blend shape, and multiple blend shapes can also be controlled simultaneously.
For example, if "e" is misjudged as "i" due to the accent, it is possible to deal with it by applying the output value of "i" to the mixture of the blend shapes "i" and "e", as shown in the picture.
Example Using AnimationClip
In addition, as long as it can be registered as an attribute, the controlled object may not only be a blend shape, but also the parameters of a Live2D model, for example.