 |
CRIWARE Unity Plugin Manual
Last Updated: 2026-07-17
|
|
CRIWARE Unity Plugin Manual
Last Updated: 2026-07-17
|
| Parameter | Description | Default Value |
|---|---|---|
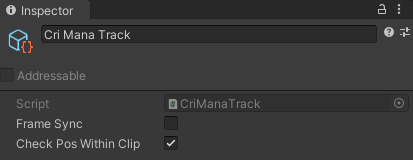
| Frame Sync | Synchronize the Timeline frame number with the video playback frame. | false |
| Check Pos Within Clip | Whether to change the video playback position when changing the playback position within the same Clip *If timeUpdateMode of PlayableDirector for playback is "Manual" Please uncheck this. | true |
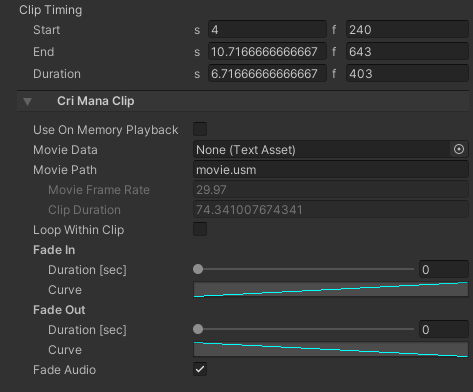
| Clip Timing | Description | |||||||
|---|---|---|---|---|---|---|---|---|
| Start | The start position of the Clip on the Timeline | |||||||
| End | The end position of the Clip on the Timeline | |||||||
| Duration | The duration of the Clip on the Timeline | |||||||
| Cri Mana Clip | Description | Default value | ||||||
| Use On Memory Playback | Disables the editing of Movie Path in the Inspector | false | ||||||
| Movie Data | Specifies a movie file in TextAsset (.bytes) format for the Clip to play You can specify a usm file by changing its extension to .bytes. TextAssets files must be placed outside the StreamingAssets folder. | None | ||||||
| Movie Path | Specifies the path to the usm movie file for the clip to play The path can also be set by dragging and dropping the usm file from the Project window. | |||||||
| Movie Frame Rate | Frame rate of the movie file that the clip plays This item cannot be edited. The information will be updated during the first play or preview. | |||||||
| Clip Duration | Length of the movie file played by the Clip This item cannot be edited. The information will be updated during the first playback or preview. | |||||||
| Loop Within Clip | Whether to loop playback within the Clip when the length of the Clip is longer than that of the video file. | false | ||||||
| Fade In | Fade In Settings for clips
| |||||||
| Fade Out | Fade Out Settings for clips
| |||||||
| Fade Audio | Whether to fade the audio when the clip fades in/out | true |