Create a new CRI Atom Craft project and add it to the repository.
(1) Create a new project
Create a new CRI Atom Craft project.
(1-1) Launch CRI Atom Craft
Select [CriAtomCraft.app] or [CriAtomCraft.exe], start CRI Atom Craft.
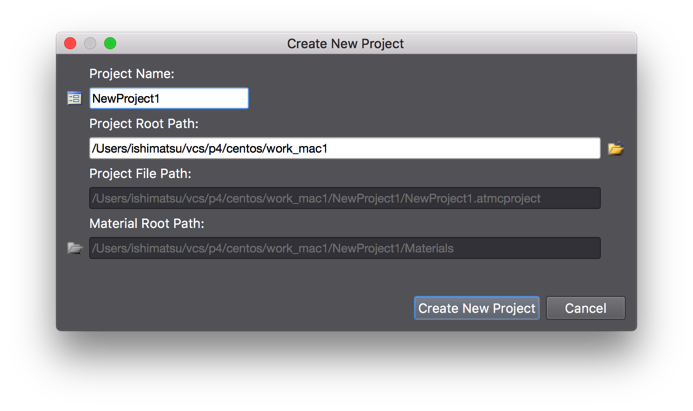
(1-2) Create a new project
Select [File] -> [Create a new project] .

- Project Name
Here, we use the project name "NewProject1".
- Project Root Path
Specify where you want the project to be saved.
Project files, work unit files, materials, etc. will all be saved under the folder specified here.
Please specify the folder path which is to be under the workspace already created.
(1-3) Create a work unit
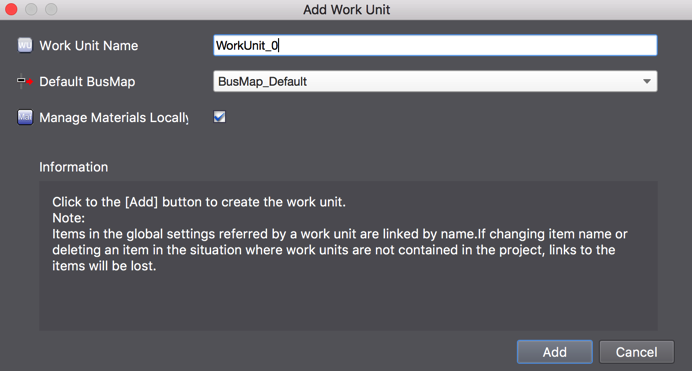
When you create a new project, the [Add Work Unit] dialog is displayed automatically.
Here, we create a work unit that will be the basis of our future editing work.

- Work Unit Name
Keep "WorkUnit_0" for the name.
- Default bus map
Keep "BusMap_Default".
- Manage materials locally
Keep this option checked.
When it is checked, the materials are managed a the work unit level.
(1-4) Create a CueSheet and add a Cue
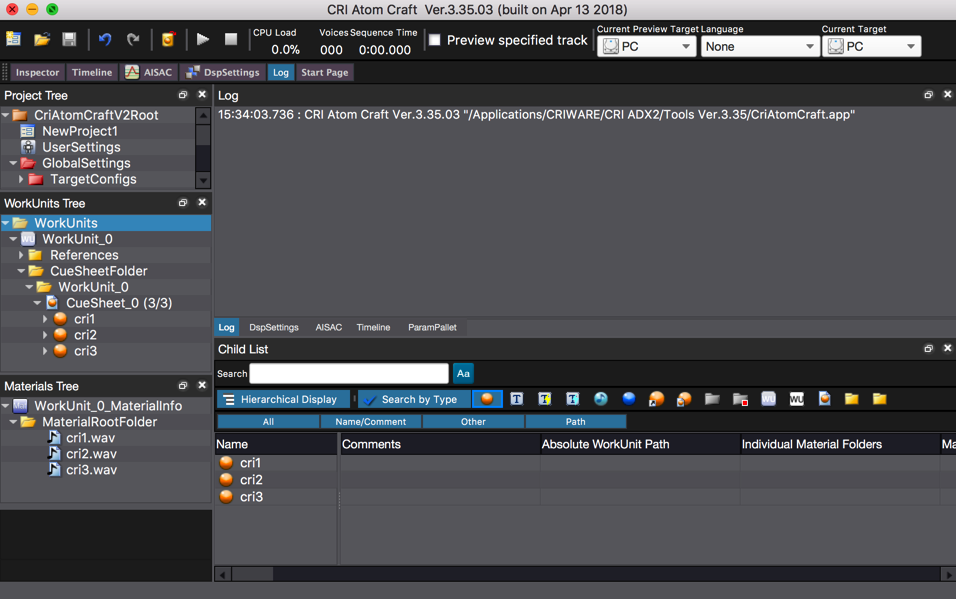
When you create a new project, the CueSheet [CueSheet_0] is automatically added for you.
Drop material files on this CueSheet to add Cues.
When you drop the material files, the Cues are automatically added to the CueSheet.
(1-5) Save the project
Save the project and quit CRI Atom Craft once.
To save the project, select [Save Project (All Files)] from the [File] menu.

(2) Register the project with the repository
Add the newly created project to the Perforce depot (repository).
We assume here that the Perforce depot is already created.
(2-1) Run the [Add] command within P4V
- Within P4V, [Add] project files under the workspace and [Submit].
 Add project from P4V
The CRI Atom Craft project is now registered with the repository.
- Note
- The following files are also created under the project root folder, but you do not need to add them to the repository:
- User configuration files (.user_settings, .atmcuser)
- Cache files ("NewProject_Cache" folder)
- Output files ("PC" folder)
- Backup files ("NewProject_Backup" folder)
- User configuration files (.user_settings, .atmcuser)