- You can use the "CRI Atom Craft" authoring tool for CRI ADX to create CRI ADX data for Unity.
The following steps will show you how to use the tool.
- [Important] What are the differences between CRI ADX for Unity and CRI ADX for game consoles?
If you are already familiar with CRI ADX, you can use CRI Atom Craft in the same way for sound authoring.
(1) Creating a CRI Atom Craft project
(1-1) Starting CRI Atom Craft
- First, double-click on the CriAtomCraft.exe to start the tool.
- Attention
- To activate the tool, you need to execute the CriAuthorizationTool.
Register your e-mail address according to the guide displayed when starting the tool for the first time, and activate the tool license.
Please refer to "CRIWARE Authorization Tool Manual" for details.
- //CRIWARE/Tools/Authorization/manual/manual/eng/contents/index.html
(The tool is located in the {SDK_ROOT}/CRIWARE/Tools/ADX2/ver.3 folder.)
If not successfully started the tool, please check the operating environment.
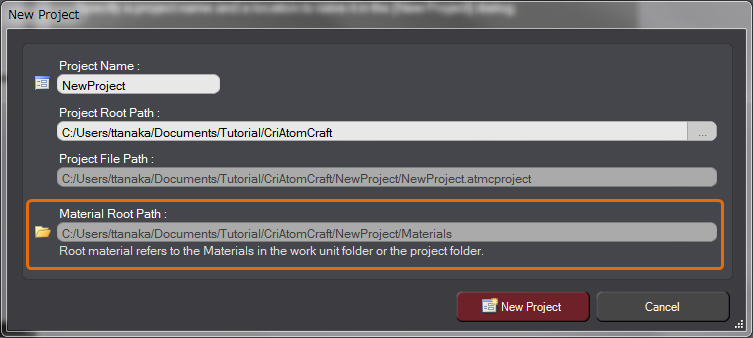
(1-2) Creating a new project
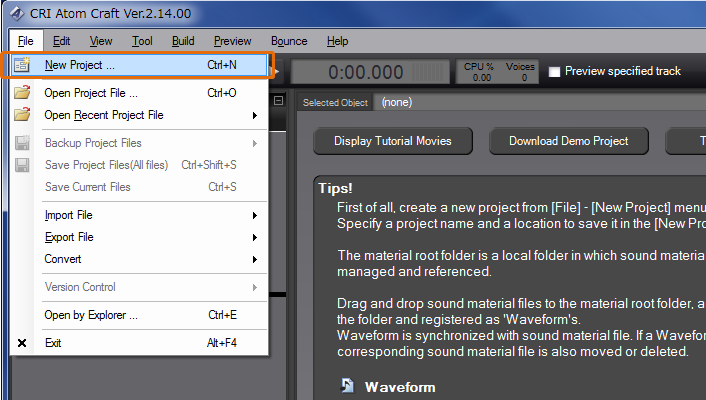
- Select the [New Project] command from the [File] menu.
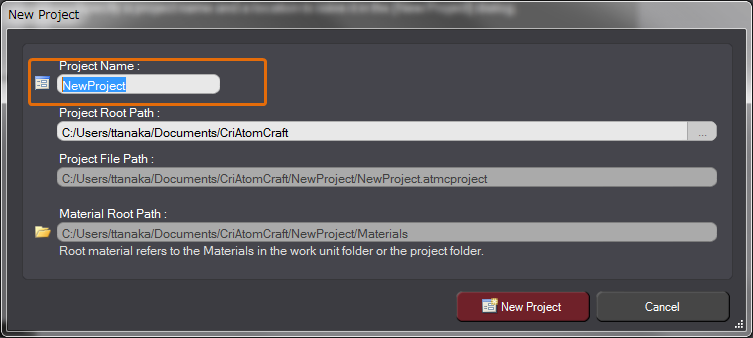
- Enter project name.
Enter project name, "TutorialProject", to the [Project Name] in the [New Project] dialog.
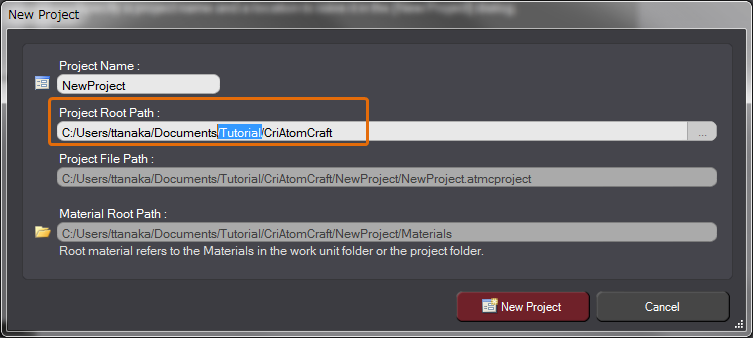
- Specify destination to save the project.
"My Documents" is set by default for the [Project Root Path].
Append "/Tutorial" to the path.
- Specify destination to store material files.
The Materials folder where is located immediately under the project is set by default.
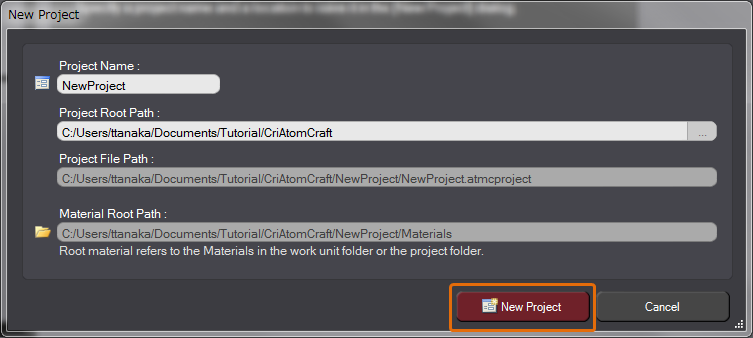
- Click the [New Project] button.
- If a new folder creation dialog appears, please select "Yes".
Through this process, a new project has been created.
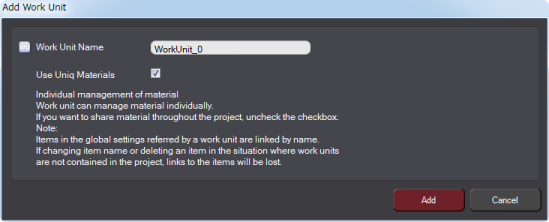
- The [Add Work Unit] dialog appears. Enter work unit name, and click the [Add] button.
A work unit has been added to the new project.
By default, a material folder for this work unit is created .
(2) Creating a CueSheet
(2-1) Creating a CueSheet
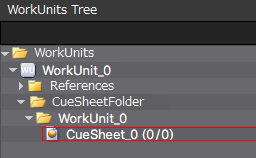
- When creating a new project, a CueSheet with the name [CueSheet_0] is automatically prepared.
- Changing CueSheet name
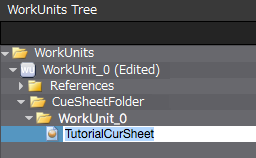
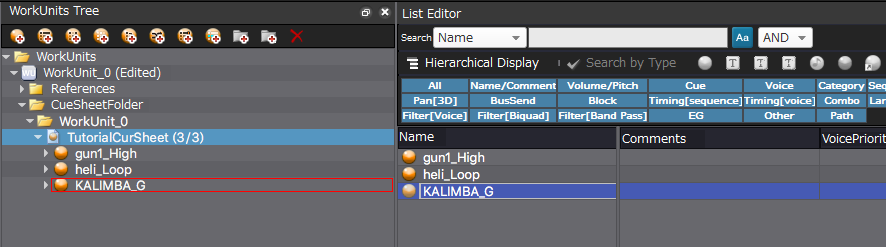
Select the [CueSheet_0] on the Project Tree, push F2 key to edit Cue name, and change the name to [TutorialCueSheet].
(2-2) Adding a Cue
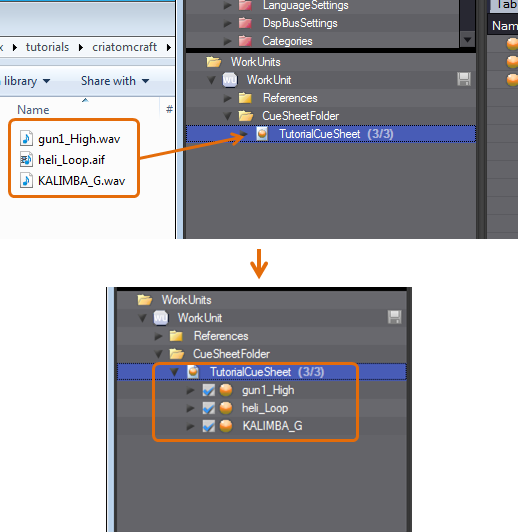
- Drag and drop material files on TutorialCueSheet in the project tree.
Drag-and-drop material files to the [TutorialCueSheet] on the Project Tree.
Use the material files located in the [{SDK_ROOT}/CRIWARE/SDK/Tools/ADX2/tutorials/criatomcraft/tutorial_materials] folder.
(2-3) Preview
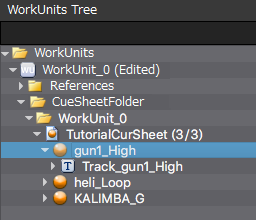
- Select a Cue on the Project Tree, and push SPACE key to perform single playback.
[F5] key to start playback, [F6] key to stop playback.
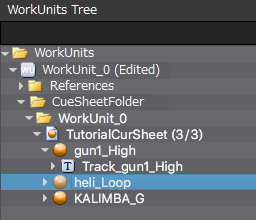
- Preview loop waveform data
In the case of loop waveform data, the playback continues until hitting [F6] key to stop.
- Preview on the List
After selecting the CueSheet on the Project Tree, they can also be previewed on the [Child List] on the right side of the Tree.
It's useful when continuously playing and checking a large amount of Cues.
(3) Building CueSheet binary files
(3-1) Building CueSheet binary files
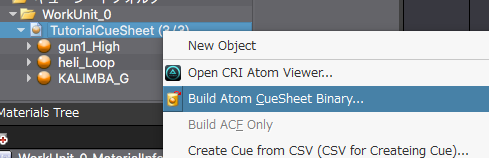
- Select the CueSheet on the Project Tree.
Select the [Build Atom CueSheet Binary] command from the Context menu.
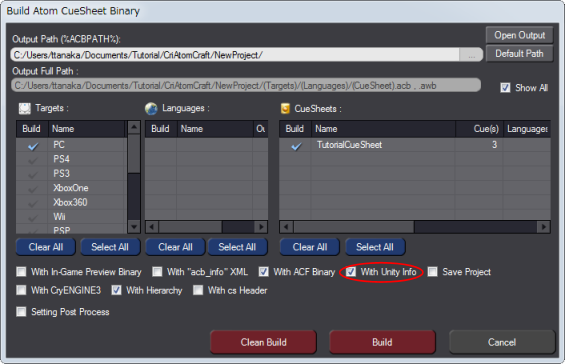
- The [Build Atom CueSheet Binary] dialog appears.
Go forward without changes to the destination.
- To create CRI ADX data for Unity, select the Unity Information Output option.
Ensure that the ACF Binary Output option is selected as well.
Click on the Build button. The "CueSheet binary files" and the "Unity information file" are created.
- [Note] Files required for playback in Unity
This tutorial requires the following files in the PC/Assets folder under the Tutorial project folder.
(AWB files are not created because streaming playback is not used.)
- "CueSheet binary files" (StreamingAssets subfolder)
- TutorialProject.acf
- TutorialCueSheet.acb
- Unity information file (Plugins/CriWare/CriAtomProjInfo subfolder)
- CriAtomProjInfo_Unity.cs (*)
- (*) The Unity information file is an auxiliary file that is required to show a list of cues in Unity Editor.
It is only used for development and not when an application is executed.
(*) In the old versions, "Unity information file" was required, but, in the new versions, CRI ADX has been improved so that it can operate without Unity information file.
When building CueSheet binary files for the old versions, Unity information file (Assets/Plugin/CriWare/CriAtom/CriAtomProjInfo_Unity.cs) may be created, but deleting the file causes no problems.
(3-2) Saving project files
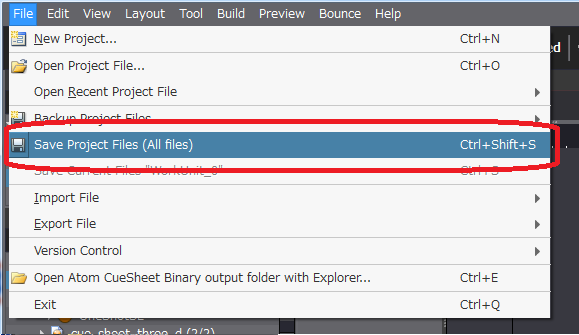
- To save your project, select the [Save Project Files(All Files)] command from the [File] menu.
- Attention
- In order to use the data created with CRI Atom Craft for commercial use, it is necessary to set a project key for the project.
The method for setting a project key for a project is as follows:
- Select [File]->[Project Key Manager...]
- In the displayed "Project Key Manager" dialog, select the "Project Key registration" button.
- In the "Project Key registration" dialog that appears, enter the project key and select the "Register" button. When the project key setting is completed, the project key information is added to the project file and saved automatically.
Please refer to [CRI ADX Tools Manual] -> [Project Key] for details.
- //CRIWARE/Tools/ADX2/ver.3/manual/eng/contents/criatom_tools_license_project.html