CRI ADX(Unreal Engine) v1
中級編19 音を鳴らしたままパーシスタントレベルを切り替える
通常、パーシスタントレベルを切り替える際に音声は停止します。
しかし、音を鳴らしたままパーシスタントレベルを切り替えたいこともあるでしょう。
今回はその方法について解説します。
音を鳴らす前に
説明上の混乱を避けるため、前回のチュートリアルでレベルに配置した音とレベルブループリントに配置したノードを取り除いてください。
GameInstanceブループリントクラスを作成する
新しいブループリントクラスを作成します。
このとき親クラスとして「GameInstance」を選択してください。
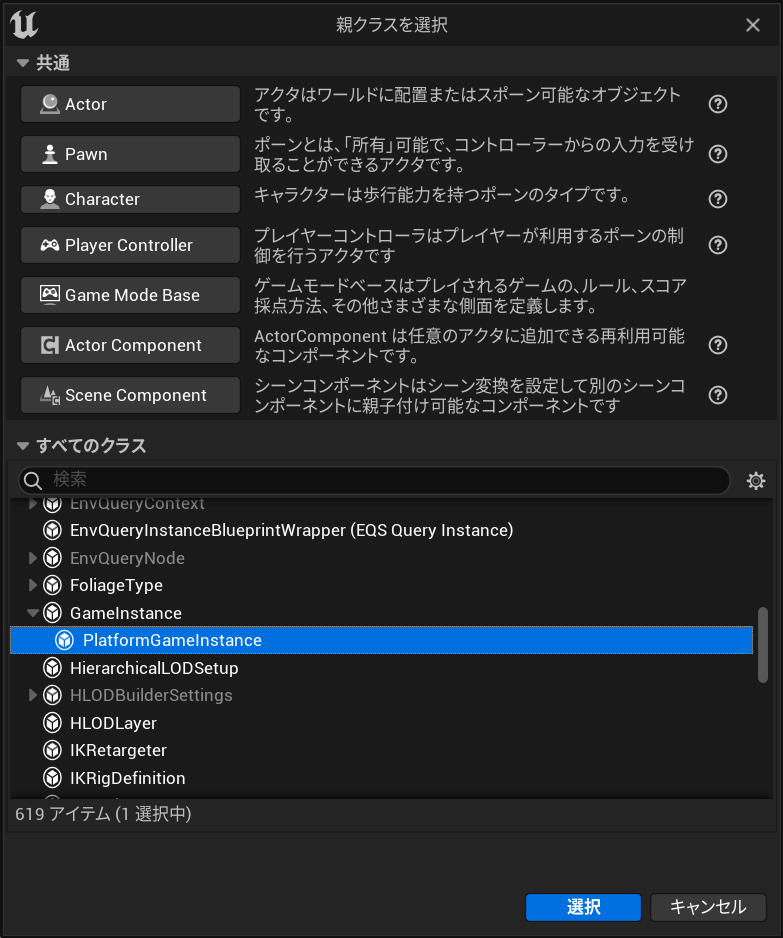
今回は「AtomGameInstance」という名前にしましょう。
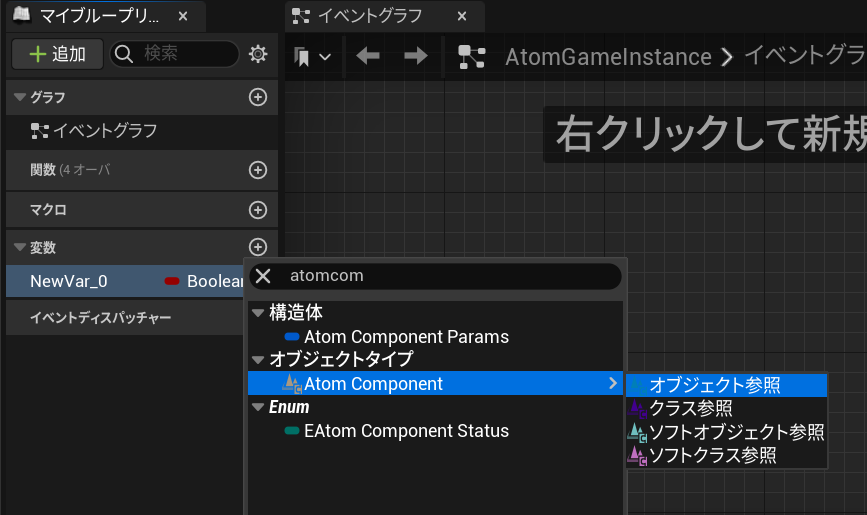
AtomGameInstanceブループリントクラスを開きます。

変数を1つ追加します。
型はAtomComponentの「オブジェクト参照(Object Refference)」を選択してください。
今回は「MyAtomComponent」という名前にしましょう。
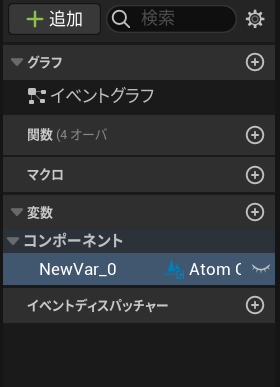
ブループリントをコンパイルしてください。
GameInstanceブループリントクラスを使用する
プロジェクト設定の「マップ&モード」ページを開いて、「Game Instance Class」という項目を見つけてください。
その設定を「AtomGameInstance」に変更します。
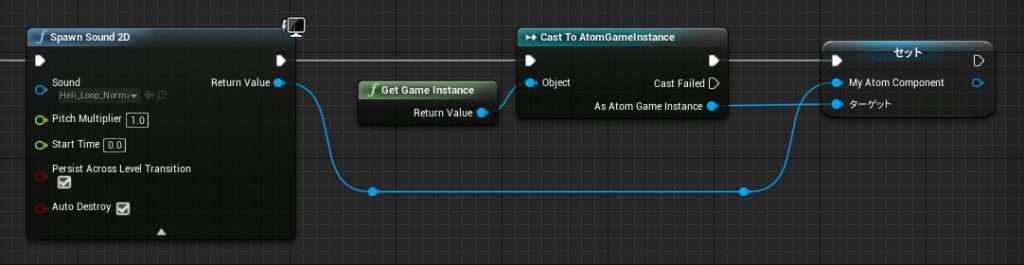
音声を再生する
- レベルブループリントを開きます。
- 「Spawn Sound 2D」ノードを実行します。
- 「Sound」ピンには2Dサウンドを指定してください。
- おすすめは「Heli_Loop_Normal」です。(初級編07で配布済み)
- 「Persist Across Level Transition」ピンにチェックを入れてください。
- また、「Return Value」をAtomGameInstanceのMyAtomComponentにセットします。
設定は以上です。
この方法で音声を再生すれば、パーシスタントレベル切り替え時に音声が止まることはありません。
音声を止めたいときは?
パーシスタントレベルを切り替えた後、音声を止めたいときは下図のようにします。
