CRI Sofdec(Unreal Engine) v1
入門編05 Full Screen再生とUIでのムービー再生の方法(Mana Player編)
この章では、FullScreenやUIでSofdecムービーを再生する方法をご紹介します。
FullScreenでのムービー再生はUMG(Unreal Motion Graphics)を使うことで、画面全体をカバーする画像をUIレイヤーに貼り付けて表示することができます。
具体的な手順は以下のとおりです。
1.Sofdecムービーをインポートして、Manaアセットを準備
「入門編01 Sofdec ムービーの単純再生(Mana Player編)」の手順に従って、フルスクリーン用のムービーをUE5にインポートしてください。
マテリアルの編集から、マテリアルの"Result Node" を選択します。
詳細パネルで「Material Domain」を"User Interface"に変更してください。
この操作により、ムービーマテリアルがUMGウィジェットで使用できるようになります。
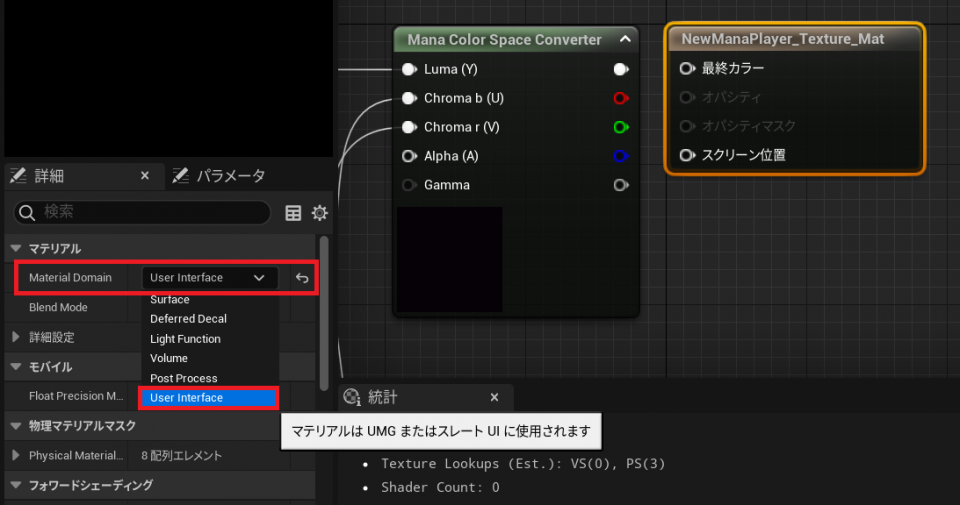
注意: 必要に応じて、ManaColorSpaceConverterからの出力を結果ノードのFinal color(アルファムービーが使用されている場合は、不透明度も)に再リンクする必要があります。
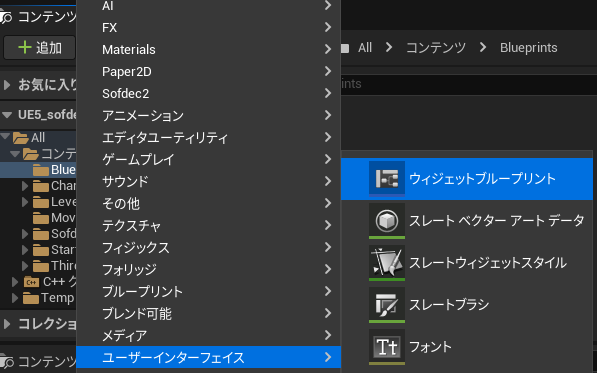
2.シーンに新しいUserWidgetブループリントを追加
コンテンツブラウザで新しいブループリントクラスを作成します。
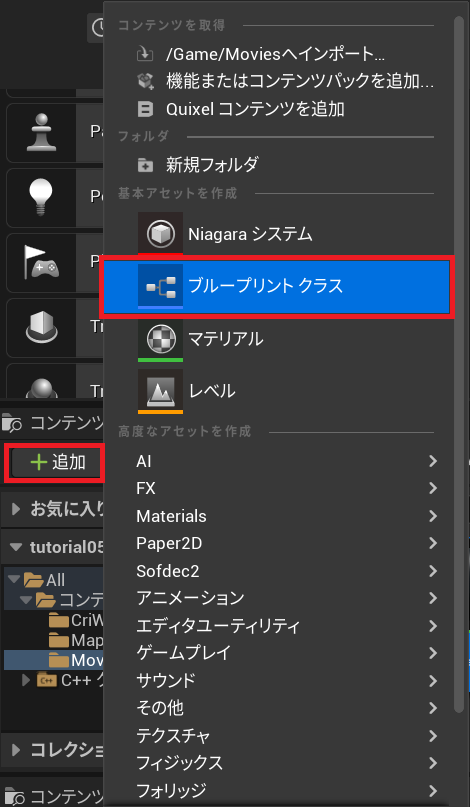
"全てのクラス"を展開して、 "Visual/Widget/UserWidget"を選択します。
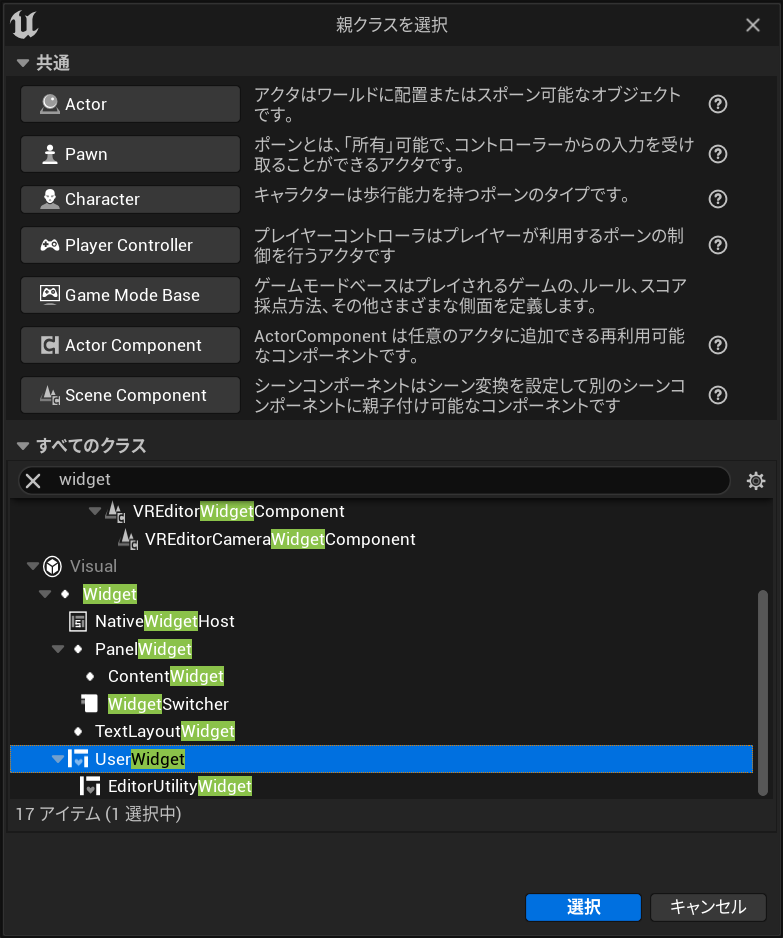
作成したアセットの名前を "FullScreenWidget"に変更します。

3.ウィジェットを編集
「パレット」パネルで「Image」ウィジェットを検索し、デザイナーにドラッグ&ドロップします。
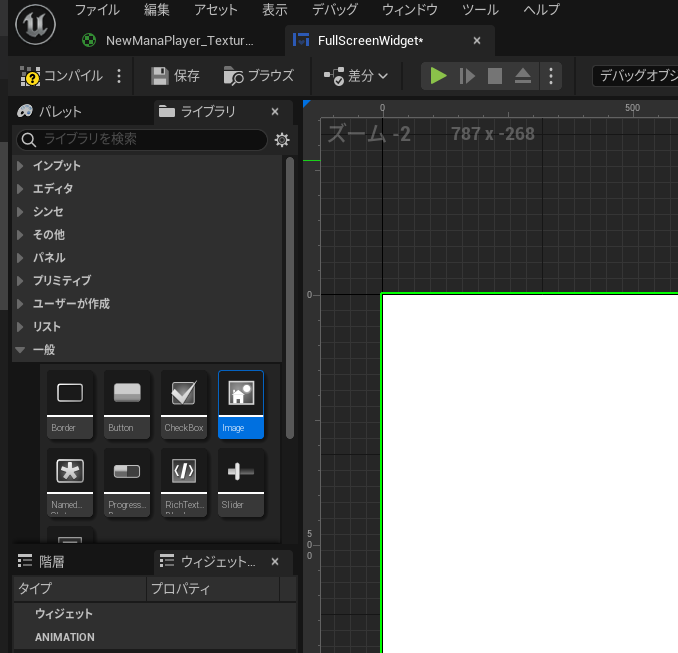
デザイナーでImage ウィジェットを選択して、詳細パネルで「Appearance/Brush」を展開し、「Image」の欄にムービーマテリアルを設定します。

4.レベルブループリントの編集
レベルブループリントを開きます。 (「ブループリント」ボタン -> 「レベルブループリントを開く...」)
次のブループリントコードを追加してください。
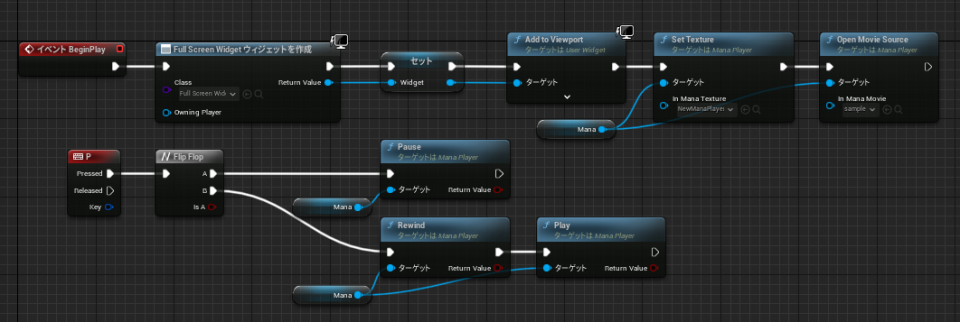
こちらからブループリントコードをコピーできます:https://blueprintue.com/blueprint/f4vovdgr/
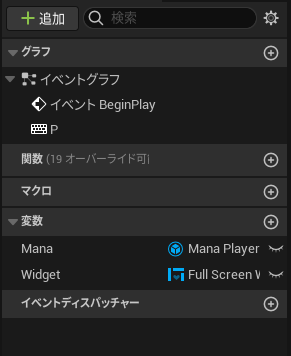
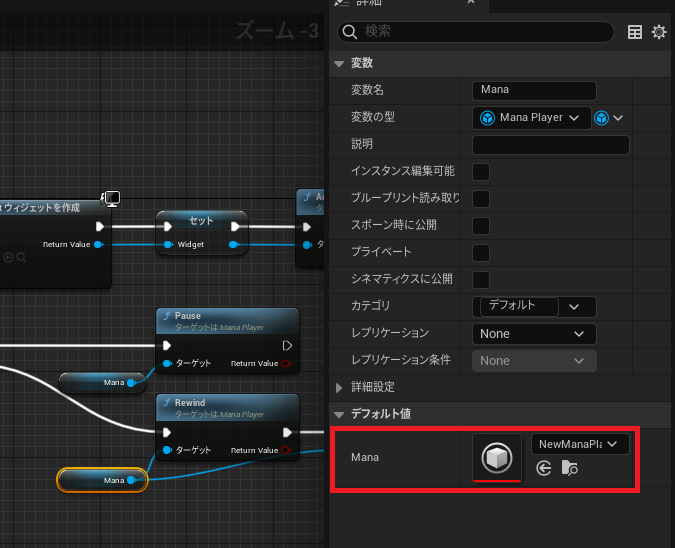
3つの変数を作成します。
| オブジェクトタイプ | 説明 |
| Mana (Mana Player オブジェクト参照) | ムービーを再生するためのMana Playerを所有します。 |
| Widget (FullScreenWidget オブジェクト参照) | ムービーを表示するためのウィジェットを所有します。 |
「Mana Player」ノードの詳細パネルで「Mana」を設定します。
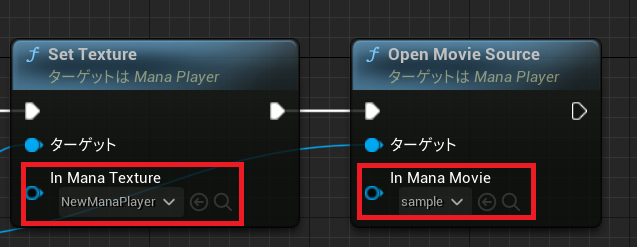
「Set Texture」ノードの「In Mana Texture」を設定します。
「Open Movie Source」ノードの「In Mana Movie」を設定します。
ムービー再生が終了すると、「OnEndReached」イベントが発生するので、その時にFullScreenWidgetを非表示にします。
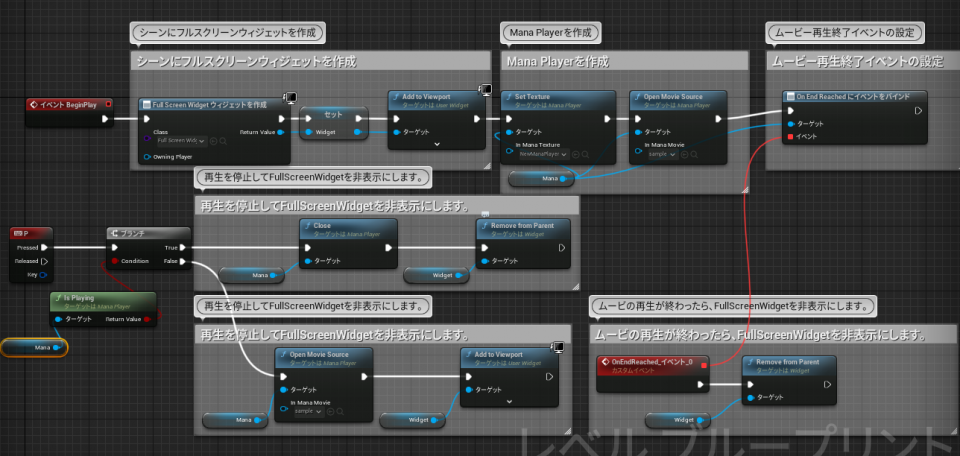
またこのブループリントでは新たに以下の変数を追加します。
- Is Playing (ブーリアン) 再生ステータスを保持します。
UIでのムービー再生
上述の「Full Screenでのムービー再生」の手順でUIを作成できます。
その後、UMGで必要なUIオブジェクトを追加して、アクションを接続していきます。
ここでは、再生ボタンと停止ボタンを持つUIを例に紹介します。
UIでのムービー再生方法
UIにボタンを追加します。
ウィジェットデザイナー
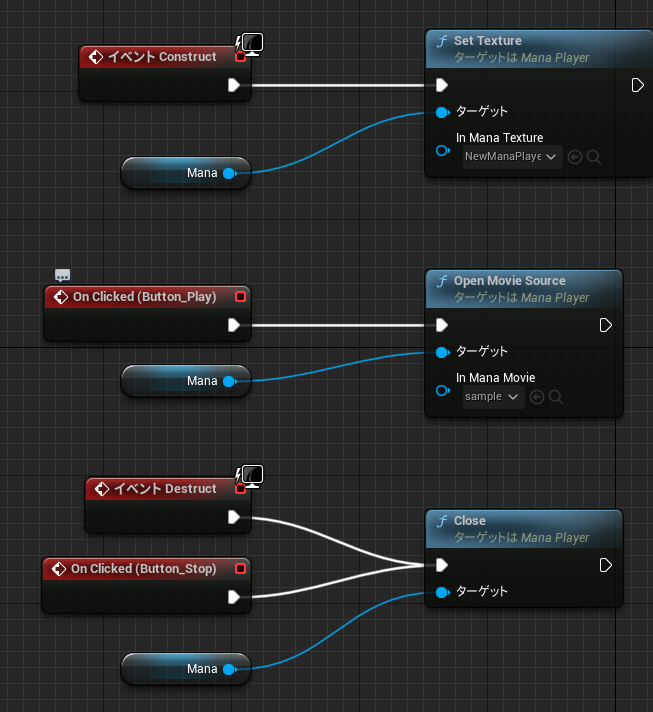
ブループリントで、「Mana Player」の参照の変数を追加し、ボタンをクリックした時のイベントのコードを追加します。
「Stop」ボタンを押すとMana Pauseが呼び出され、「Play」ボタンを押すとMana ReWindが呼び出されます。
コンテンツブラウザの「追加」->「ユーザーインターフェイス」->「ウィジェットブループリント」を選択してください。
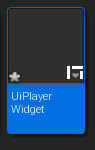
ここでは名前を「UiPlayerWidget」とします。
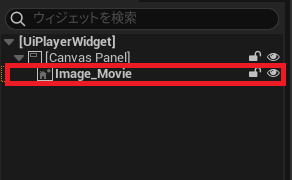
「パネル」->「Canvas Panel」をドラッグ&ドロップします。

次に「一般」->「Image」をドラッグ&ドロップします。
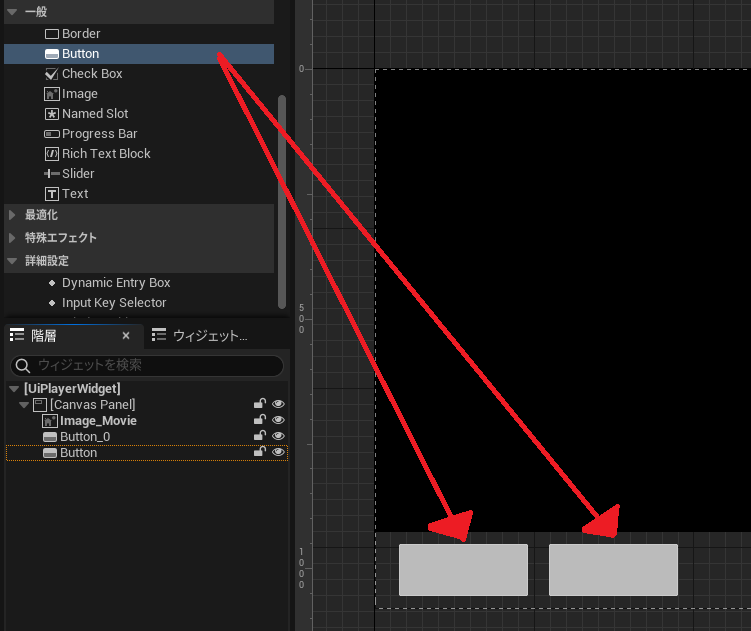
同様に「一般」->「Button」をドラッグ&ドロップします。
今回は動画の再生と停止を操作する「Stop」と「Play」の2つを用意します。
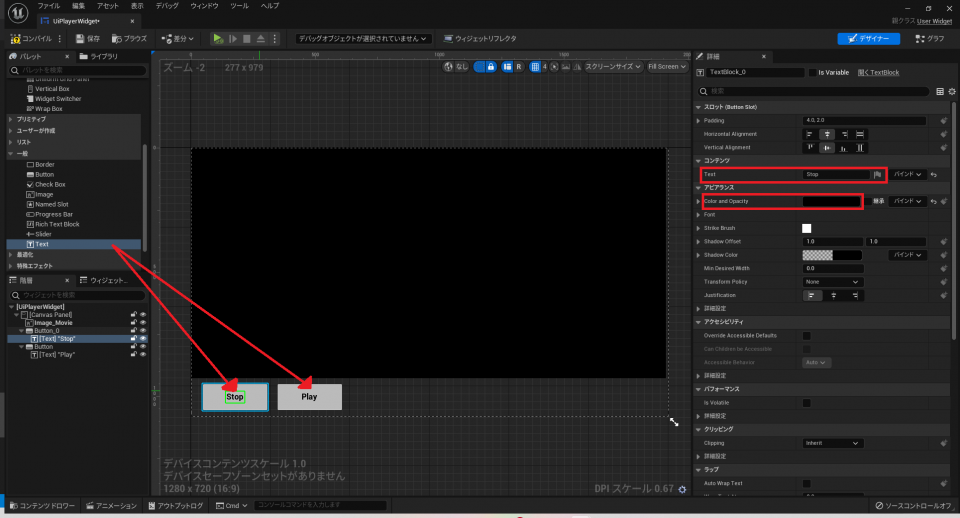
次にボタンに文字を付けます。
「一般」->「テキスト」を配置したボタンの上にドラッグ&ドロップします。
その後「詳細」タブの「コンテンツ」->「Text」で表示する文字を入力します。
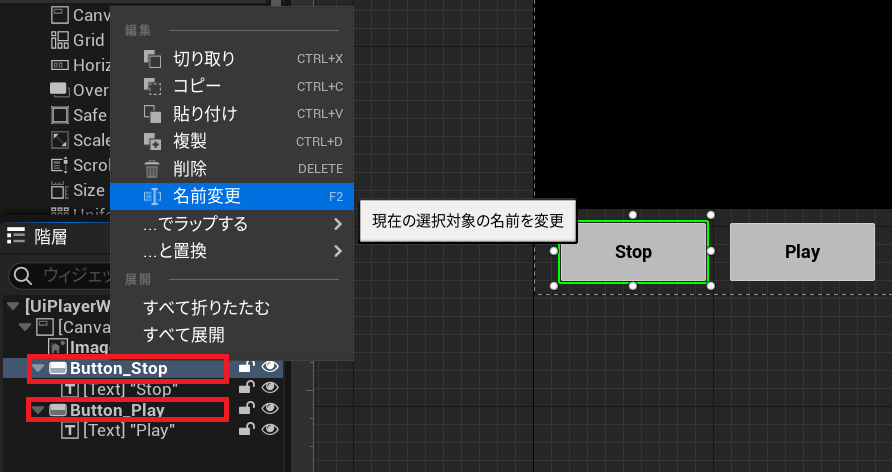
次に「階層」からButtonの名前を変更します。「Stop」と「Play」がどちらのボタンかわかる名前であれば構いません。
(今回は「Button_Stop」と「Button_Play」としています)
ウィジェットブループリント
ユーザーがUIを制御できるように制御モードを設定します。
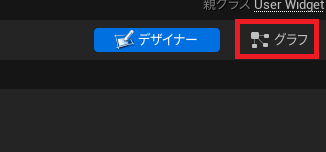
現在開いている「ウィジェットデザイナー」の右上から「グラフ」を選択します。
レベルブループリント
こちらからブループリントコードをコピーできます。
https://blueprintue.com/blueprint/j_bfoawd/
Unreal Engine マニュアル参照
UMGとアクターコンポーネントの詳細については、Unreal Engineのドキュメントを参照してください。
UMG http://api.unrealengine.com/JPN/Engine/UMG/
Actor Component http://api.unrealengine.com/JPN/Programming/UnrealArchitecture/Actors/Components/